iCal sharing is most-common in plenty of web-based calendars and known for an easy and friendly event schedule sharing without much manual work.
Web-based calendars allow you to export the calendar in the .ics format, which you can import in your Shoutem mobile app to display your event schedule. That .ics file contains your event schedule information such as event name, start and end time, dates when the event will take place, and event’s description if you saved it in the first place.
Friendly to work with!
Share your calendar events with simple export-import action, but most importantly, the events will be automatically updated whenever the events are updated in the origin web-based Calendar.
Exporting the iCal feed
Extracting iCal feed steps really depends on the web-based calendar you are currently using, Later we will share steps examples by the most used web-based calendar – Google Calendar.
Regardless of the web-based calendar provider, in most cases, iCal URL is by default generated and is waiting for you to use it. You only need to find it. Since we can’t cover all the basics, here are a few guidelines that might help in searching:
- Every calendar has its own Settings where the magic happens
- iCal URL is saved in sections such as Integrate calendar, Share, Import & Export
- A calendar that could be shared also should have Access permissions in its Settings. Make sure to mark your calendar as Public or your Shoutem app won’t be able to access Events.
Add iCal Events screen
iCal links are added via the iCal Events extension. Having in mind you can add only one iCal feed per one iCal screen, you can add as many iCal screens as you need.
In the Screens area, click on + symbol, and under the Content section, find the iCal Events
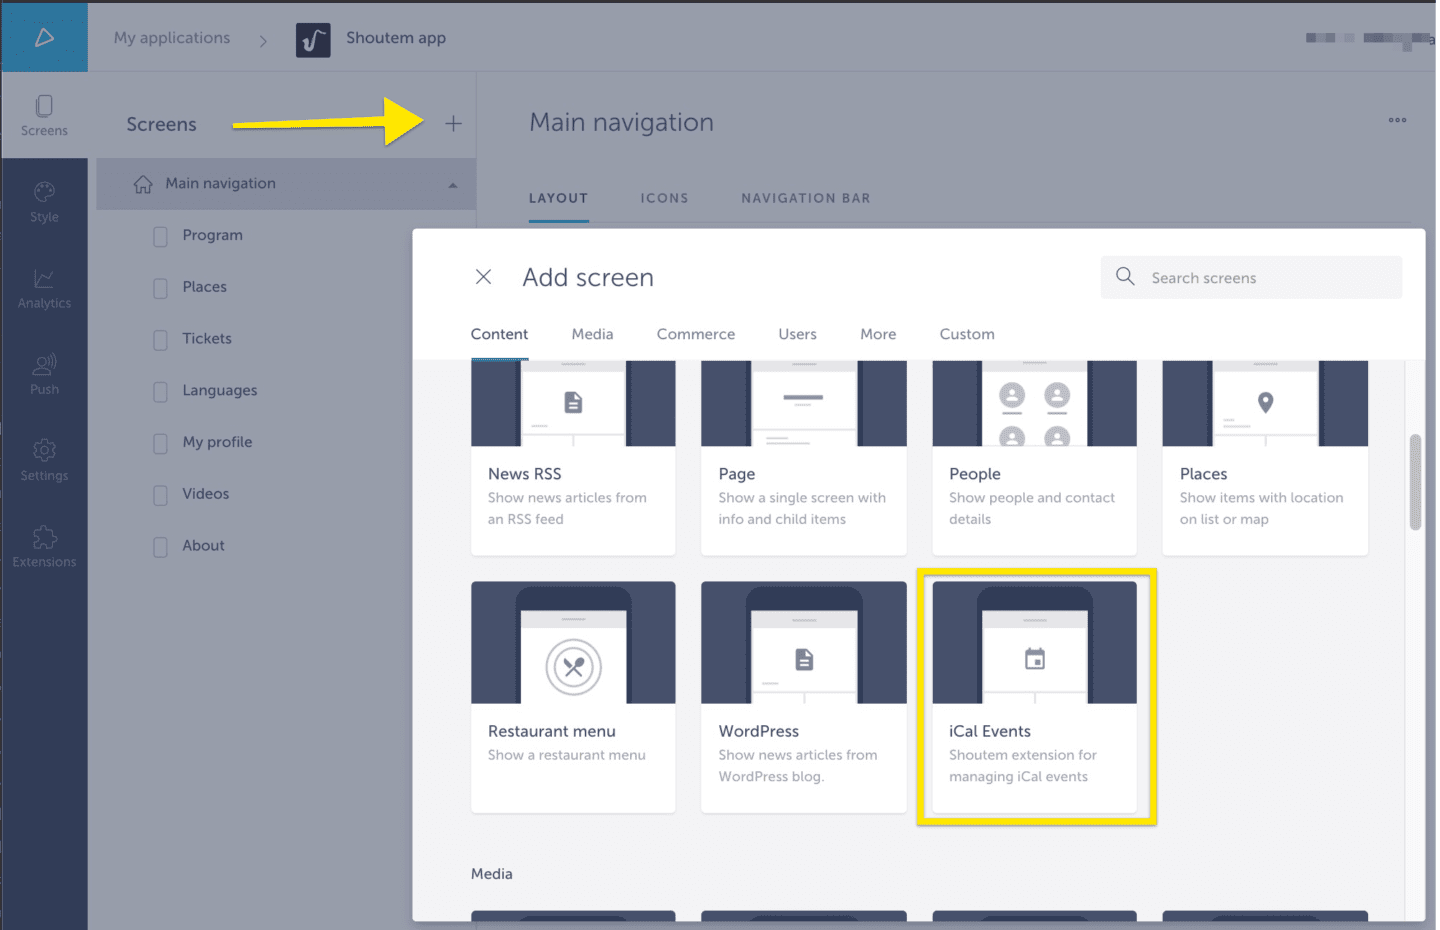
Selecting it, the iCal Events screen will be added to your Main Navigation screens list.
Save iCal feed
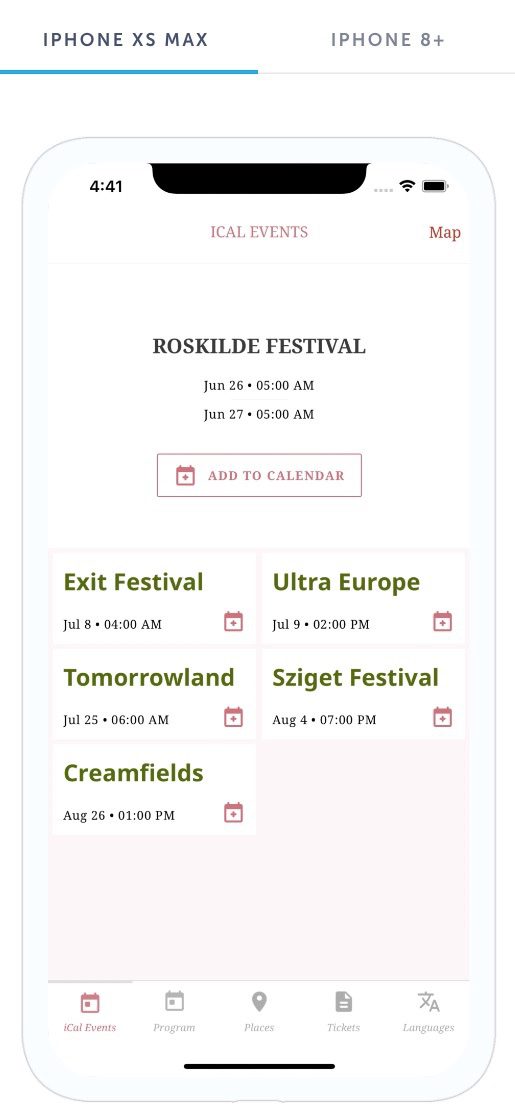
iCal Events screen has one place holder for one URL feed, if you have generated it properly, the URL will be saved properly and your events will start in the app.
As mentioned, the event’s basic details will be displayed. If you have a Location added in your web-based Calendar, that will not be presented in the app.
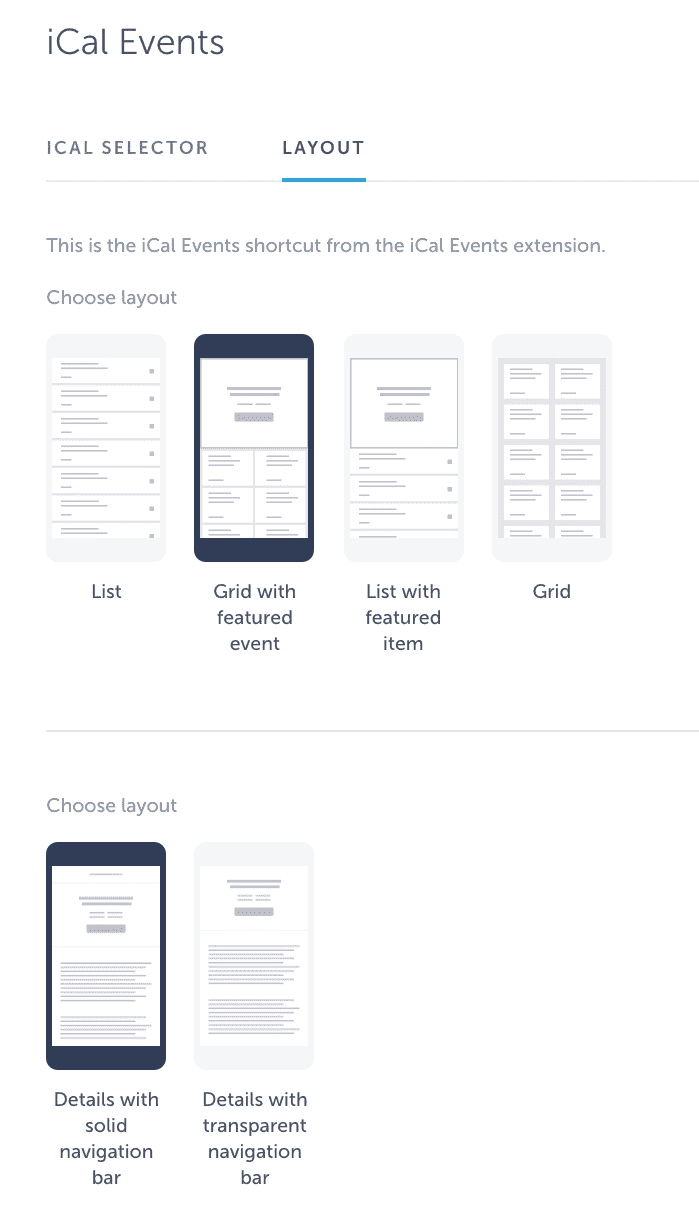
Layout options
Like for any other screen, there are several Layout options for a dynamic look and feel user experience instead of having one layout accross all the app.
Specifically, iCal layouts do not have images included since images can’t be imported via the iCal feed. If you would like to present your events with images and not just plain text, we advise you to consider adding events manually via our Events extension.
Style Customization options
Using existing style options from our Style > Customize theme tab, you can change the look of the wording. For easier adjustments, please see the following details of which settings are applying to respective areas of the iCal screen.
Before you start customizing, have in mind the following style settings are not applying only to the iCal screen but generally accross the whole application.
- Navigation bar (header) → Icons color: effects on the buttons in the navigation area
- Typography → Subtitle: changes the color of event title visible layout list
- Typography → Caption: changes the color of date and time
- Typography → Text: changes the color of the event’s description
- Buttons → Primary text, Primary background color, and Primary button border color will customize the Calendar symbol and button
If you are using a layout with a featured item, changing the title color of the featured Event is done under Typography → Title.
Google Calendar iCal feed
Let’s start by logging in to your Google account here. We will assume you already have a Calendar ready for sharing and proceed right away on how to obtain the iCal feed URL.
If you don’t have one yet, you should create it first and then continue with the below steps.
On the left sidebar, you have a list of your calendars. Hover over the calendar you wish to import, and you should see a vertical ellipsis icon that stands for Settings.
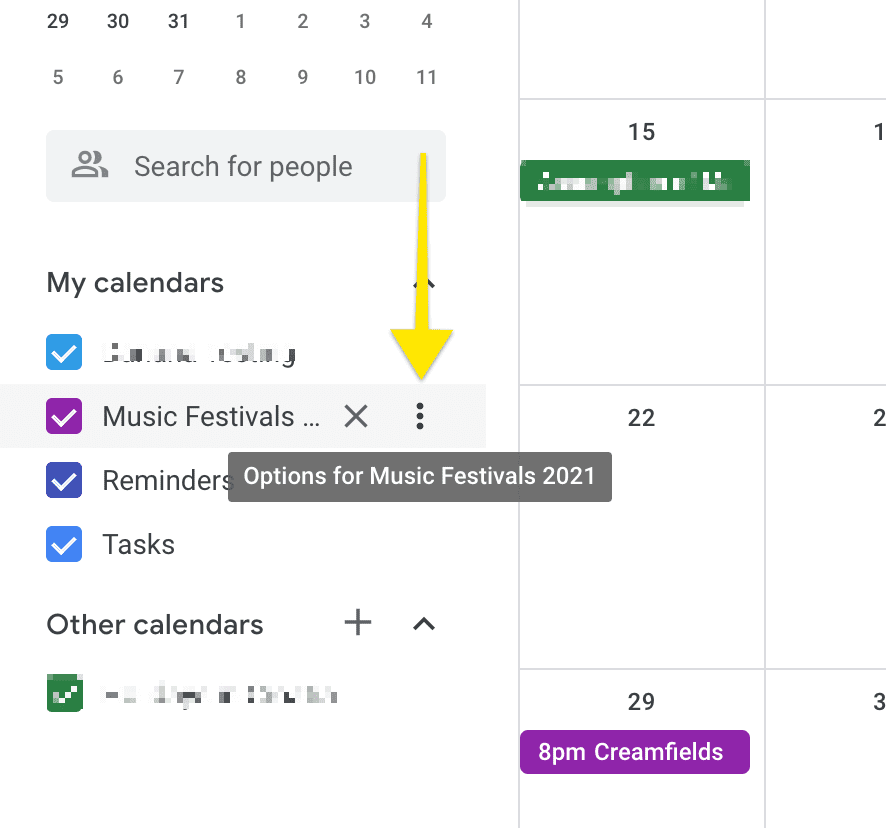
Click on the Settings, Settings and sharing option and an additional screen will appear with all settings tied to your selected calendar.
On the Settings screen make sure to adjust Access permissions and allow Make available to the public. This step is very important, make sure not to miss it.
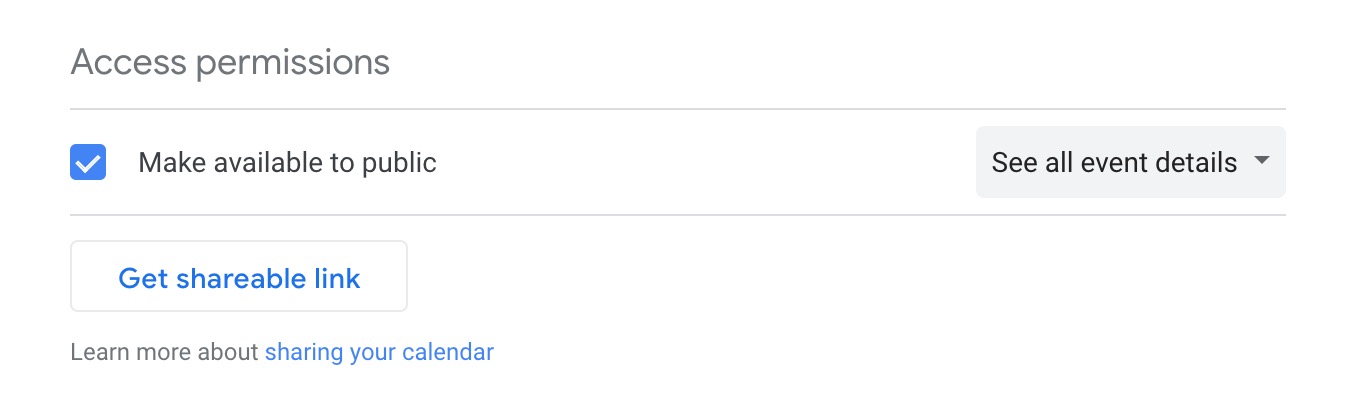
Navigate to Integrate calendar section, here you will see the Public address in iCal format. Copy the whole URL and save it in the iCal Events screen in the Shoutem builder area.
Feel free to start the preview of your app, and if everything is done correctly, your Events from the Google Calendar will appear in the app.