Use the CSV importer to speed up the process of creating lists
Step 1: Make the file.
Create a CSV file with a column for each element you’ll need in your final list.
We’ve created an example for you. ClickHEREto see the example list as a CSV file.[You can unzip and open the CSV file with txt editor, or import it to a spreadsheet editor.]
When you’ve completed inputting data to your list, save it as a CSV file.
Step 2: Import the file.
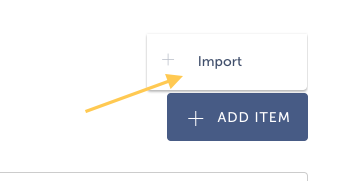
In the app’s List Editor, click the three dot icon in the top right. Then click Import.
Select Source– comma separated values and browse for your list.
Note: Think you might need to edit your list further? You can edit in the builder(CMS).
Select Just OnceunderSynchronization settings.
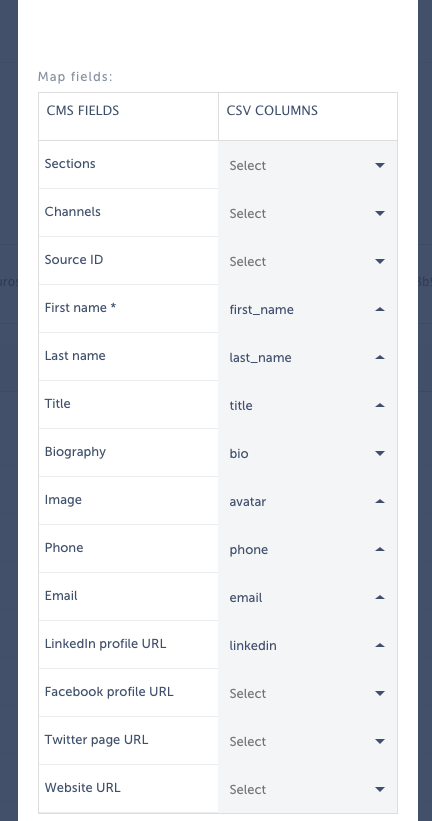
Match each element for each entry in the CMS with the corresponding element from your CSV.
Note that elements with asterisks are mandatory.
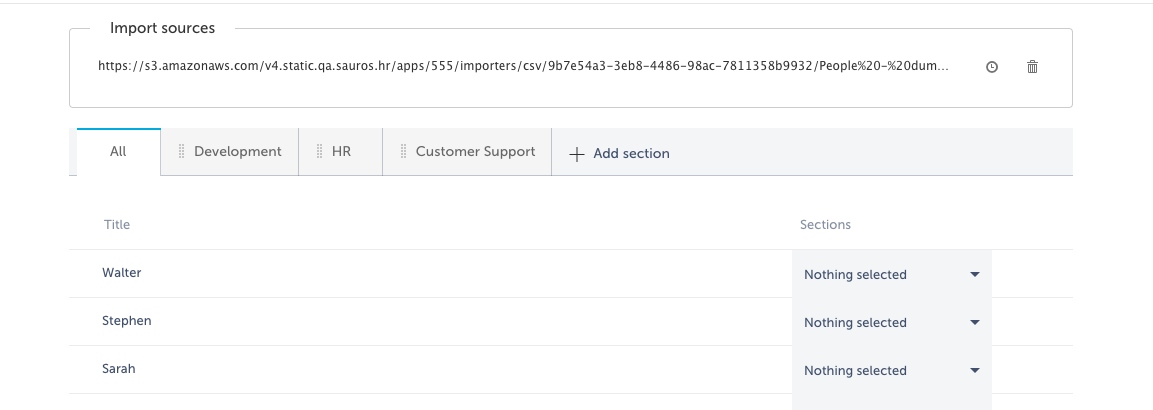
3. Click Next. Allow some time for the import to complete. You will see your CSV list imported:
Note: if you delete the imported source file, all the CMS items that were imported with that file will also be deleted regardless of if they were edited or not.
Step 4: Editing after importing the list.
Each item can be customized in the CMS(builder).
Once customization is complete, your list is ready to be previewed in your app.
Note: Imports are available only for lists with the import option. Please check your pricing plan and see if it supports the import functionality.